Tutorial System
Getting Started
The tutorial system in TutorialMAX starts with a simple component named
Tutorial Manager.
To create a Tutorial Manager, right click on the hierarchy, select "TutorialMAX", and then "Tutorial". Now click on "Setup Orchestrator". You have a couple of choices:
- Step-by-step Orchestrator: The default and most commonly used orchestration method. It simply allows you to create a step-by-step tutorial.
- Slideshow Orchestrator: Iterates through the steps in intervals, activating each of the steps sequentially until the end; with the option to loop.
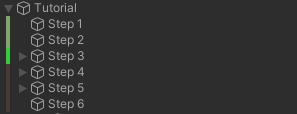
Now click on "Create New Step" to create a new step. On the new step, you can define things you want done during that step. These "things" are called State Behaviors, or Behaviors for short.
You can add your first behavior by clicking on "Add Behavior" then [GameObject => Activate GameObject or Component]. Now add 3 cubes to the scene. Add the first cube to the Objects property of the behavior you just created. Now duplicate the step two times so that you have 3 steps and assign the other cubes respectively.
Now if you click on the Play button you'll notice that the cubes will activate one by one.
Passes
Steps can be in one of the following states: NotStarted, Active, Completed, or Failed.
There usually are certain challenges or conditions based on which you let the player proceed with the next step of the tutorial. Some of these conditions are generic, while some are based on the game logic. Passes are exactly there for this purpose. They are used to mark a step as completed or failed based on certain conditions.
Add a pass by clicking on "New Pass" on a step. Here you can specify the Target Status of the pass, and also define conditions using the "Add Condition" button. You can also nest these to define complex conditions.
Notice that there are several intrinsic conditions, such as Time Delay, which simply creates a delay before the pass is marked as completed - assuming it's the only defined condition. You can also define custom conditions and bind them to your game logic very easily. Just select "(New Script)" in the context menu of the "Add Condition" button. From there, all you'll need to do is to implement the base class.
Behavior Groups
The last main thing you need to know about are Behavior Groups. These are collections of behaviors that can be activated or deactivated at once. Read more about them here.

